Skull and Cross Bones Cutter - Halloween: Optimizing Your Digital STL Files
The transition into autumn often sparks a surge in creative projects, and for makers using 3D printing technology, the Skull and Cross Bones Cutter - Halloween digital bundle represents a significant opportunity. Whether you are crafting polymer clay jewelry, baking themed cookies, or producing ceramic decorations, having immediate access to high-quality STL files allows for rapid prototyping and production. However, purchasing a digital download is only the first step. Many creators overlook the technical nuances between different cutter geometries and sizing hierarchies, leading to failed prints, damaged clay, or inconsistent baking results. Understanding the specific engineering behind these tools ensures your seasonal creations meet professional standards rather than ending up in the recycling bin.
Distinguishing Between Cutting Edge Geometries
A frequent error when downloading multi-file cutter packs is assuming all STL files function identically. This specific bundle includes two distinct cutting edge profiles, and confusing them is the primary cause of user frustration. Selecting the wrong geometry for your material can ruin both the print and your project medium.
The Standard Wall vs. Sharp Edge (SE)
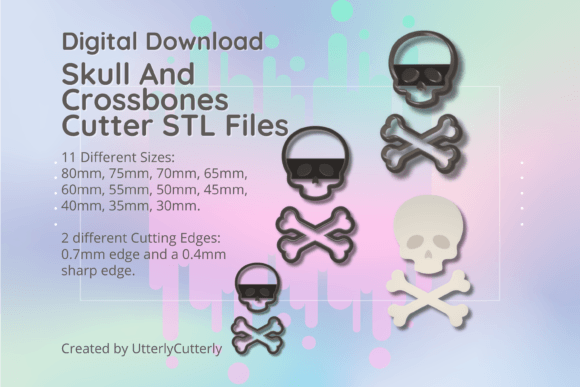
The standard cutter variant features a 0.7mm wall thickness with a 3mm thick base and a total height of 12mm. This design prioritizes durability and ease of printing. It is generally more forgiving on FDM printers and works exceptionally well for cookie dough or softer clays where extreme precision is less critical than structural integrity. Conversely, the Sharp Edge files, abbreviated as SE in the folder structure, utilize a 1mm support wall tapering to a precise 0.4mm cutting edge. While this offers superior detail for intricate jewelry work, it requires careful handling.
If you attempt to use the SE version on stiff, cold polymer clay without proper conditioning, the thin edge may deform or snap. Similarly, printing the SE file with an incorrect nozzle size or insufficient cooling can result in a blunt edge that tears rather than slices. Always verify which file type suits your current material viscosity before sending the job to your printer. For delicate silver clay or detailed fondant work, the SE is indispensable; for sturdy gingerbread or children’s craft clay, stick to the 0.7mm standard wall to prevent breakage during use.
Navigating Size Hierarchies and Measurement Standards
This digital pack provides eleven distinct sizes ranging from 30mm to 80mm. A common misunderstanding involves how these dimensions are calculated. The size designation refers to the measurement from the longest ends of the skull and crossbones silhouette, not the width of the bounding box or the diameter of a circumscribed circle. Misinterpreting this can lead to scaling errors when trying to match cutters to specific packaging, earring hooks, or cookie templates.
- Large Format (80mm–65mm): Ideal for statement cookies, large ceramic tiles, or bold pendants. Ensure your build plate adhesion is strong, as larger surface areas increase warp risk.
- Medium Format (60mm–45mm): The most versatile range for standard earrings, cupcake toppers, and general crafts. These sizes typically offer the best balance of detail and print speed.
- Small Format (40mm–30mm): Designed for miniature charms, stud earrings, or detailed garnish work. Printing these requires fine-tuning; retraction settings must be optimized to prevent stringing across small internal voids.
Before committing to a full print run, measure your intended application physically. If you are making jewelry, account for the shrinkage rate of your specific clay brand. A 40mm cutter might yield a 36mm finished piece after firing. Testing one size first prevents wasting filament on an entire set that doesn't fit your hardware or design specifications.
Embossing Line Limitations
Some designs in this collection include embossing details to add texture to the clay. These lines are engineered at 10.5mm tall, sitting slightly below the 12mm rim height. This 1.5mm differential is intentional but frequently ignored. If you roll your clay thinner than 1.5mm, the embossing feature will punch through or fail to register clearly. Always condition and roll your clay to a consistent thickness greater than 1.5mm when using embossed variants. Using spacers or roller guides eliminates guesswork and ensures the textured details impress cleanly without compromising the structural outline of the cutter.
Print Optimization for Functional Tools
Treating a functional cutter like a decorative statue is a costly mistake. Layer orientation matters immensely for cutting tools. Printing with layers running vertically (perpendicular to the cutting edge) creates natural ridges that can drag through soft materials. For the smoothest finish, orient the STL so the cutting face is parallel to the build plate, utilizing supports only if the geometry demands it. However, given the 3mm reinforced base included in these designs, most orientations should print without extensive support structures if your printer is calibrated correctly.
Material choice also dictates longevity. PLA is sufficient for occasional hobbyist use or cookie cutting, but it can become brittle over time or warp if exposed to warm clay repeatedly. For professional jewelry makers or high-volume production, consider PETG or ABS for better thermal resistance and flexibility. Always check your slicer’s wall line count; even with a 0.7mm designed wall, ensuring at least three perimeter walls in your slicer settings adds necessary rigidity without altering the external dimensions.
Managing Digital Assets and Expectations
Because this is a digital download, there is no physical safety net. Verify your file integrity immediately upon purchase. Corrupt downloads or incomplete zip extractions happen, and discovering this mid-project is avoidable. Organize your STL library systematically; separate the SE files from the standard versions to prevent accidental selection. Naming conventions matter—create folders based on size or application to streamline your workflow.
Furthermore, recognize that these files are starting points. The beauty of owning the STL data is the ability to curate custom combos. You can mix the 50mm skull cutter with other bone or bat silhouettes from our expanding weekly catalog to create unique scene compositions. However, respect the licensing terms. These files are for personal or small-business product creation, not for redistributing the digital assets themselves. Protecting the intellectual property ensures designers continue releasing new, high-quality models every week.
Ultimately, success with the Skull and Cross Bones Cutter - Halloween bundle relies on technical awareness. By respecting the differences between edge types, understanding dimensional measurements, and optimizing your print parameters for function over form, you transform a simple digital file into a reliable manufacturing tool. Take the time to test, measure, and adjust. The difference between a mediocre craft and a professional product often lies in these preliminary technical decisions.